Validate models
Validation tests
Defining validations
We have already seen the table of validation tests in the default view of the Model Catalog:

EBRAINS uses the SciUnit framework, which applies the idea of unit testing, widely used in software development, to model validation. In SciUnit, a Test encapsulates:
- the experimental data against which the simulation results are compared
- the data analysis code used to transform the data generated by the model (e.g. spike times, membrane potential traces) in the form needed for comparing to the data (e.g. a histogram)
- the measure used to quantify the difference between simulation results and experimental data
and is implemented as a Python class.
Viewing
Viewing validation test definitions
The table of validation test definitions can be configured and filtered as shown for models in Find models To view the detail of a test definition, click on a row in the table. The "Info" tab shows a description of the test definition, assorted metadata, and gives links to the code/data of all versions of the test code.
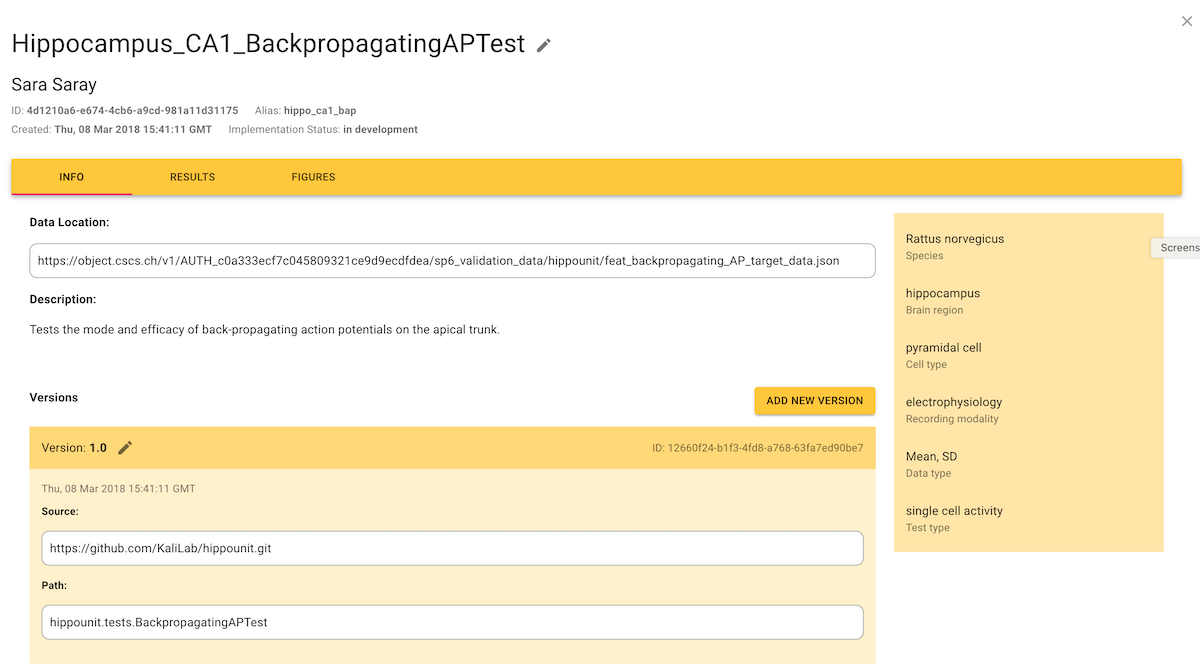
To return to the table of models/tests, click "×" in the upper-right corner.
Results
Viewing validation results
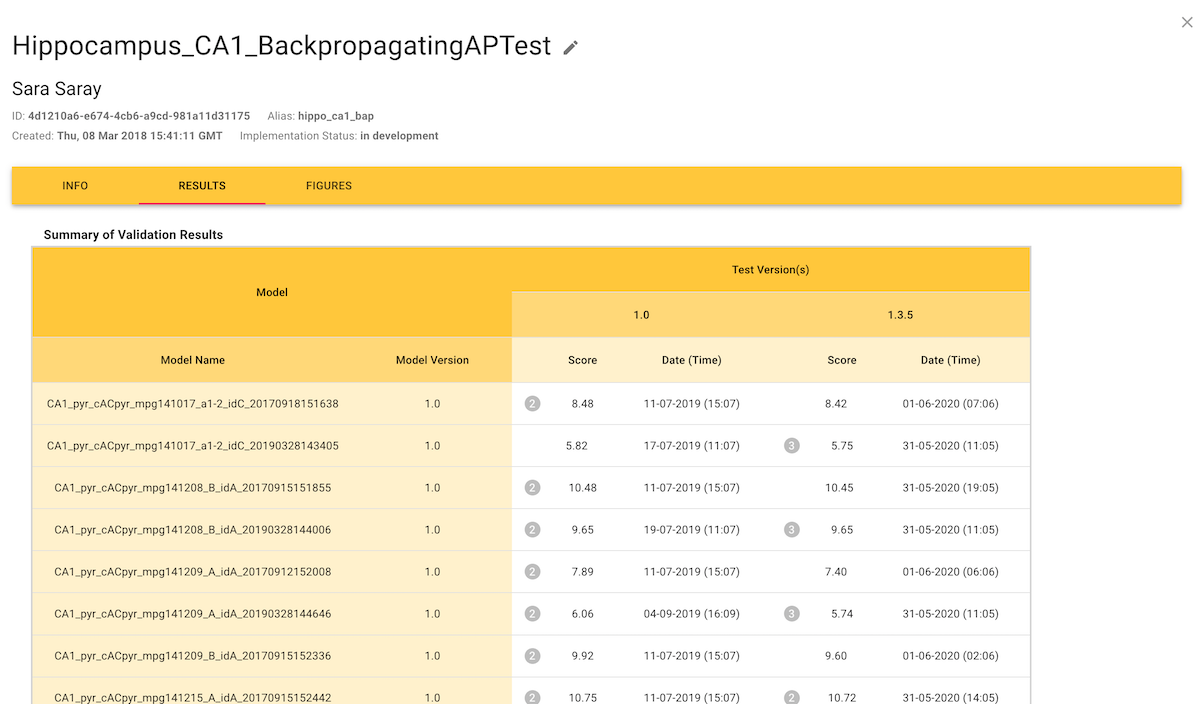
The "Results" tab shows the numerical results of validation tests, where the "Score" is a measure of the difference between the experimental data and the simulation results. When accessed from a test definition, the Results tab shows the scores for all models that have been validated with that test:
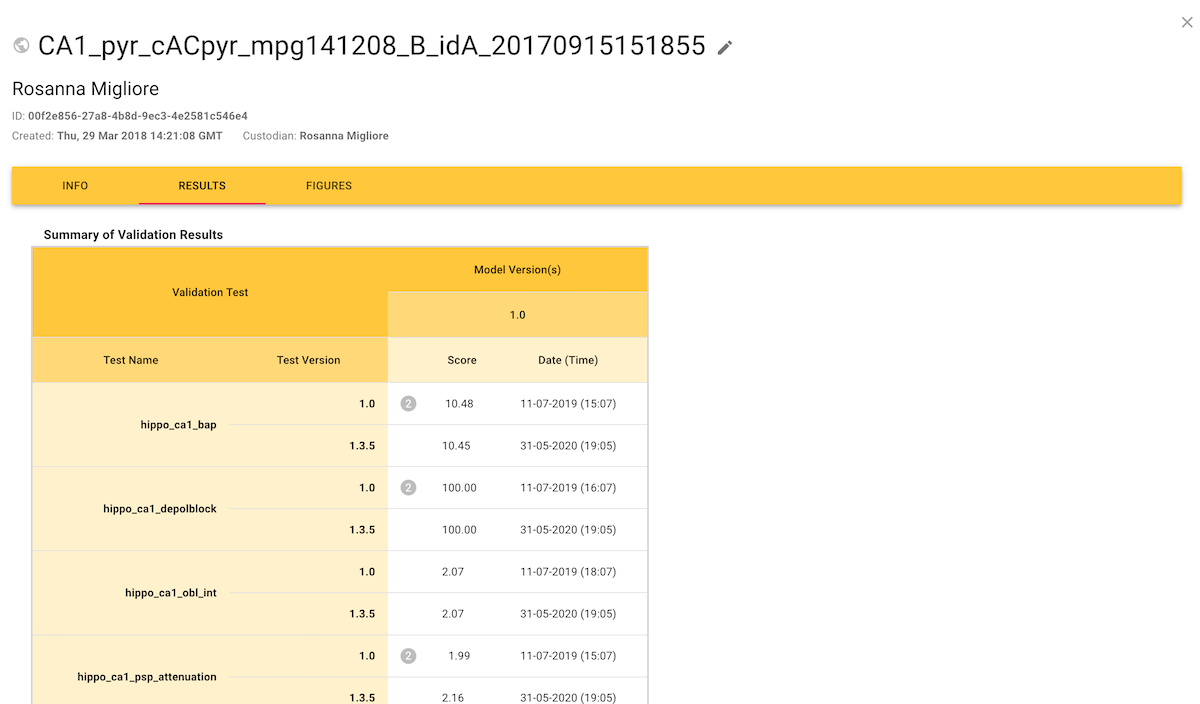
When accessed from a model entry, the Results tab shows the scores for all tests that have been used to validate that model:
The "Figures" tab shows the same information in graphical form:

In detail
Inspecting individual validation results in detail
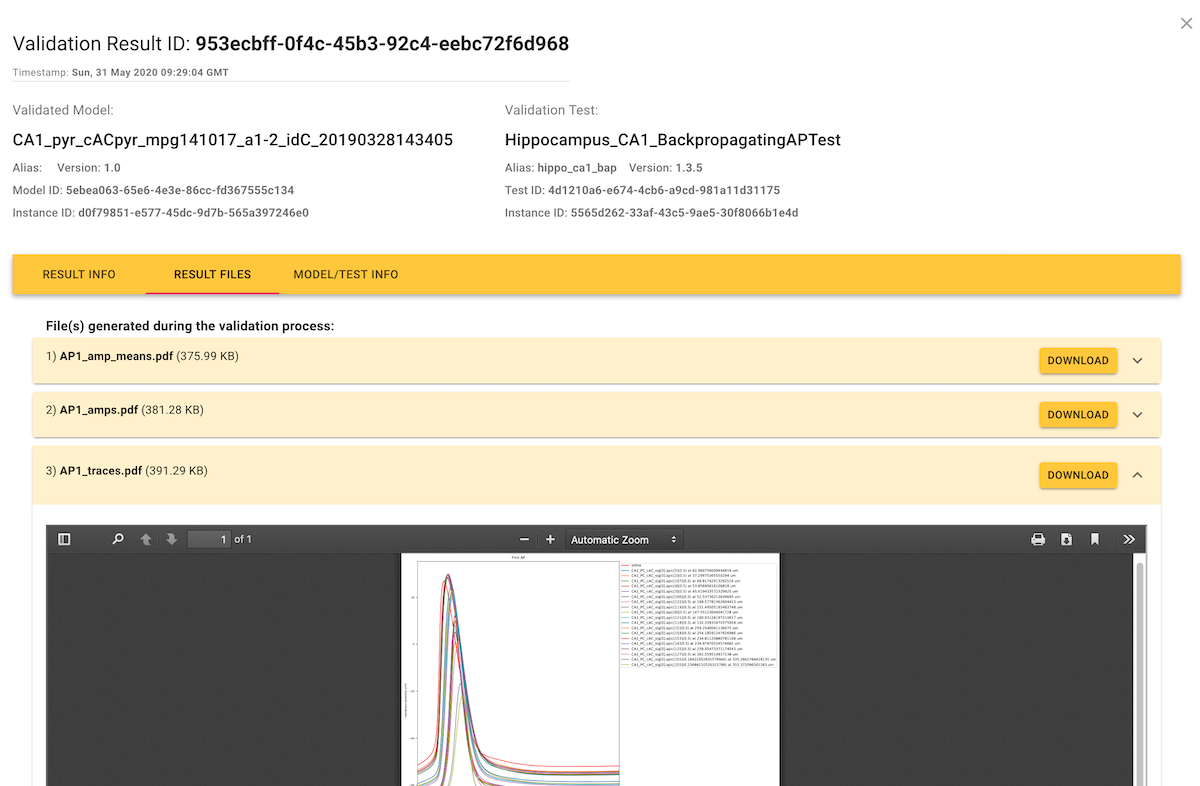
If you click on an individual score in the Results tab, this opens a dialog showing the details of the test run that generated the score.
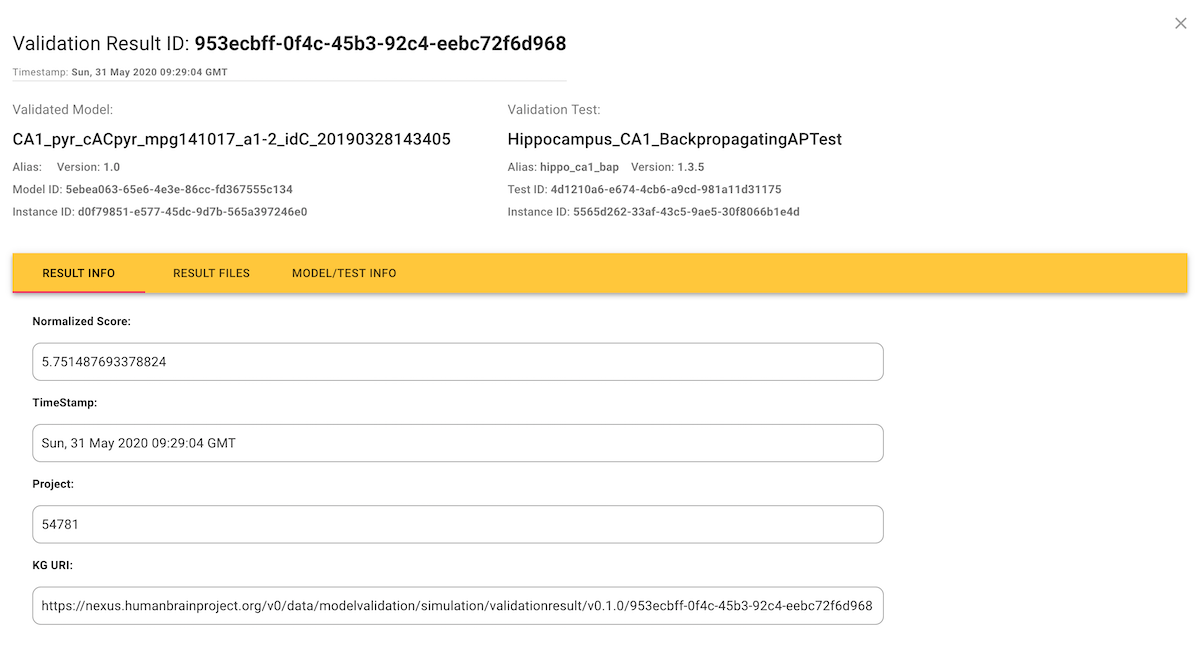
Often, the plain numerical score is not very informative about how the simulation results differed from the experimental data, and so validation test runs can also generate additional figures and tables to provide a more in-depth view, available in the "Result Files" tab.
Running
Running validation tests
We've seen how to view validation test results, how are these results generated? i.e. how do we launch the tests, run the simulations, and upload the results?
Anyone with an EBRAINS account can use the Validation Framework Python client to do this on their own computer, on a supercomputer (if they have access), or in an EBRAINS Collaboratory Jupyter notebook (if the memory requirements of the simulation do not exceed the limits of the virtual machine running the Python kernel).
Installing the Python client
pip install hbp_validation_frameworkDownloading a model
pip install hippounitfrom hbp_validation_framework import ModelCatalog, TestLibrary
from hippounit.utils import ModelLoader_BPO
catalog = ModelCatalog(username="my_ebrains_username")
model_name = "CA1_pyr_cACpyr_mpg141208_B_idA_20190328144006"
model_info = catalog.list_models(name=model_name)[0]
local_path = catalog.download_model_instance(model_id=model_info["id"], version="2.0")
model = ModelLoader_BPO(name=model_name, model_dir=local_path,
SomaSecList_name="somatic")The first time you run this, you will be asked to enter your password. For subsequent runs, the client will store a token which it will use to reconnect, until the token expires, when you will be asked again for the password. If you run this in a Jupyter notebook inside the EBRAINS Collaboratory, you should not need to enter either a username or password, as the authentication you already provided for the Collaboratory also gives access to the Model Catalog.
Downloading a validation test
library = TestLibrary.from_existing(catalog)
validation_test = library.get_validation_test(alias="hippo_ca1_bap", version="1.3.5")
Running a test and registering the result
result = validation_test.judge(model)
library.register_result(result)
This final step will run a simulation (provided you have NEURON, the simulator needed for this model, installed on your machine), process the simulation data, and compare the result to the reference experimental data. It then uploads the result (including the additional files and images generated during the test) to the Model Catalog.
For more details, see the full Python client documentation.
Contact
Any questions?
If you have questions that are not answered here, contact us by e-mail: support@ebrains.eu